Looking to revamp your elevator cabs but not sure what the process is?
Our team at K Elevator has put together this handy guide, walking you through the whole process from conception to the grand reveal.
Every standout elevator begins with a sharp vision. Before you start the process, make sure you know exactly what it’s going to look like with a 3D rendering.
Lay out your designs precisely with a design software, or try K Elevator’s free real-time Cab Design Studio and render your custom elevator cab in under 10 minutes.
Once you’ve approximated the look-and-feel of your new elevator cab, you’re ready to get started. From sourcing materials to installing your new cab, it’s important to have a team of trusted professionals who can advise you through the process and ensure everything can be done safely and efficiently.
Get started by contacting our team of experts at K Elevator. You’ll be paired with one of our experienced Account Managers, who will help you create a brand new elevator design that perfectly fits your budget and vision.
If you used the Cab Design Studio, you’ll already have a rough idea of the materials and finishes available. For your left, right, and rear wall panels, as well as floors and ceilings, you can choose from our Standard Line of premium materials, consult with our in-house designer to create your custom look, or connect us with your interior designer, and we’ll take care of the rest.
To learn more about the different parts of elevator interiors, check out our earlier blog post.
Nobody likes to stand under unflattering lighting. We’ll make sure to help you choose lights that can add to the atmosphere of the elevator cab and create a comfortable ambiance for your passengers.
At K Elevator, we use only standard LED for all our lighting to maximize efficiencies in energy, cost, and durability.
Now that we’ve established how your new elevator cab will look, we can begin to look at accessories to protect your interiors and keep them looking shiny and new.
This can include protection pads, notice holders, and more. You can read more about the effectiveness of accessories in our blog post.
After the purchase order for your new elevator design has been finalized, a member of the team will be sent over to your building to complete an elevator survey.
This is a crucial step in the process that will allow us to address any outstanding safety or design issues, and offer suggestions to improve the final installation.
Upon your approval of our team’s final drawings from the onsite survey, we’ll be able to jump right into production, which typically takes 8 – 10 weeks after approvals.
Once that’s done, you’ll be contacted by our Coordinator to schedule the preferred time of your installation with us. This waiting period will be the hardest, but the anticipation will pay off once you see your brand new elevator cabs.
And that’s it! Building a new elevator cab may seem daunting at first, but with the right partners, you know you’ll get exactly what you envisioned.
Our team of experienced experts at K Elevators are fully equipped to help you transform your elevators.
From minor repairs to major renovations on a deadline, we’ve got you covered every step of the way. Contact us today for an effortless upgrade.
The ideal experience in an elevator should be pleasant and comfortable. Passengers should feel a sense of security and serenity as they travel inside a beautifully designed cab.
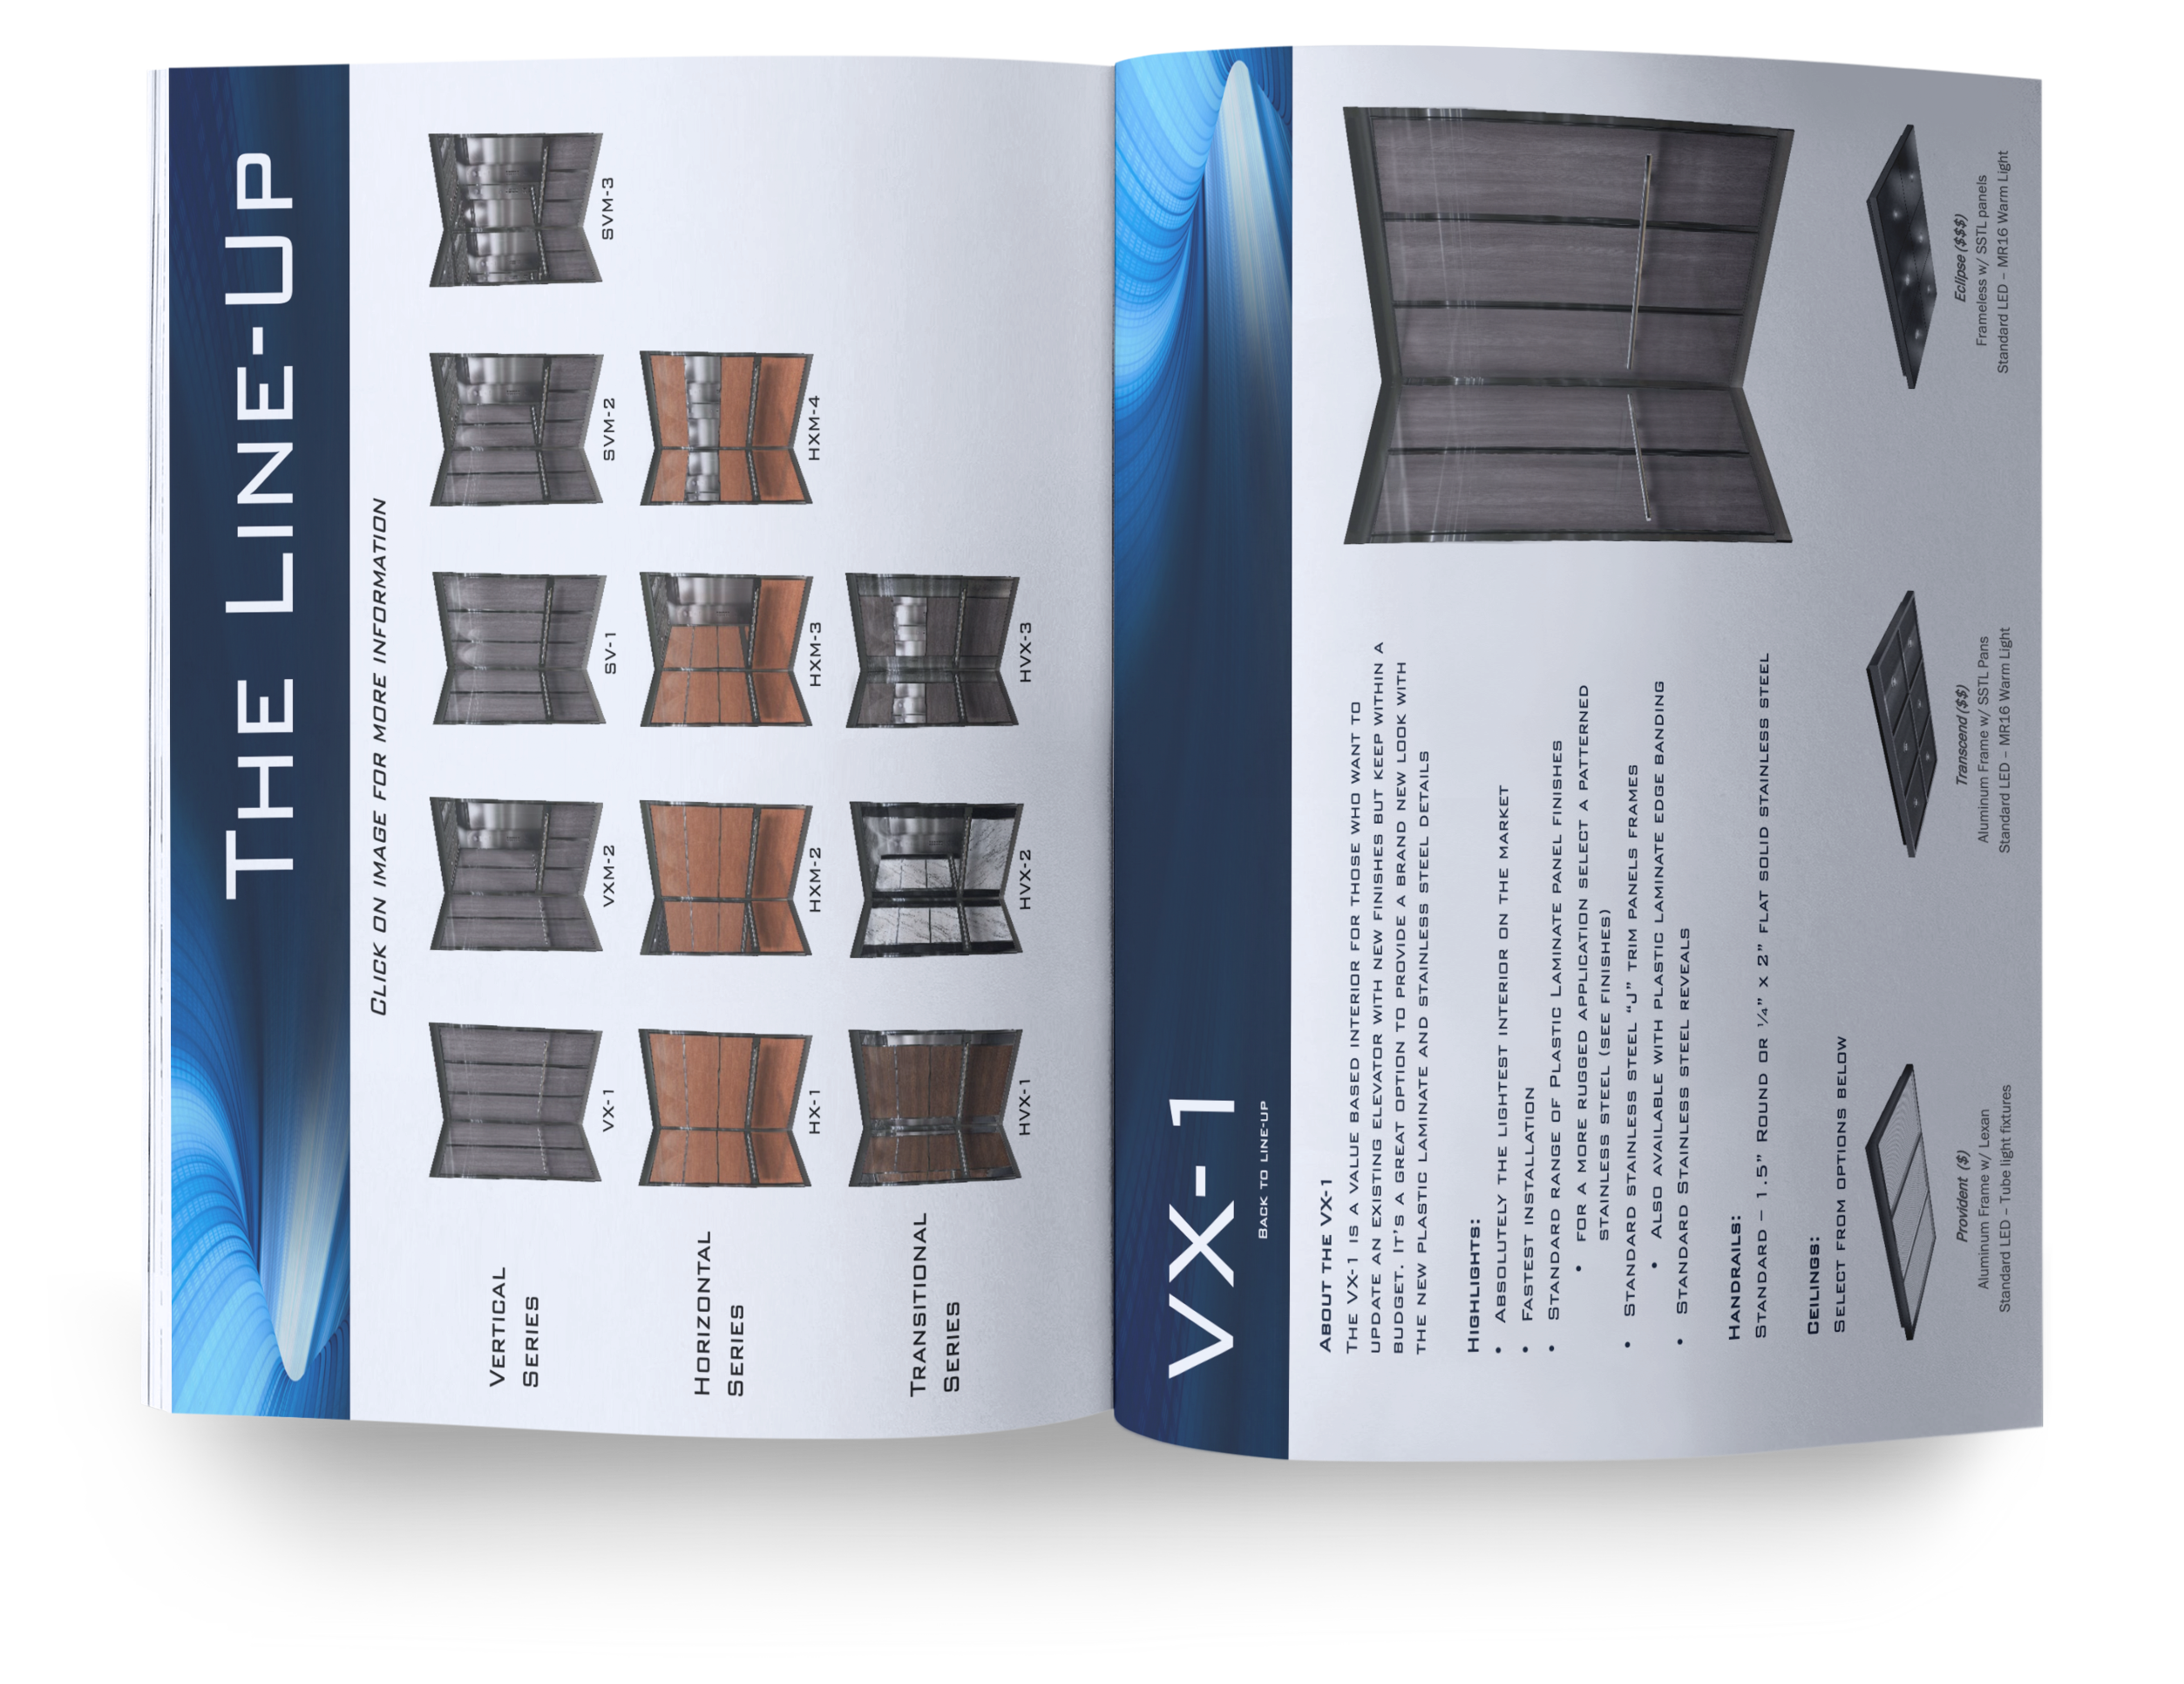
Browse through our 12 Elevator Interior models and see our finishes, flooring, and accessory options.